

How we prepared Tidal Tools to run on M1 (Apple Silicon)
The release of Apple M1 chip (also known as Apple Silicon) in November, 2020 was one of the significant events in computer industry for the past few years. It boasted the improved performance and the top-notch efficiency, so there was no surprise that a lot of power users would switch to that new architecture as soon as possible.
While everything was fantastic in terms of new Apple hardware, there were numerous complaints that some software stopped working or worked buggy on the newest Mac computers with M1 chip. Software vendors just hadn’t been ready to quickly update their applications and libraries for Apple Silicon.
We, at Tidal, were eager to release our CLI application — Tidal Tools — for the newest chip from Cupertino. But since we rely on a lot of third-party technologies the update process wasn’t smooth. However, we managed to complete it successfully. This long post describes our journey.
How to cross-compile Go app for Apple Silicon (M1)
At Tidal we build our CLI application — Tidal Tools — to make it easier for our customers to deal with all sorts of data necessary for their cloud migrations journey. The CLI app could be run anywhere — on a manager’s Microsoft Windows workstation, on a developer’s Apple MacBook Pro, or even on a Linux server since a long time ago in a datacenter far, far away… Because of this, having the ability to build the app for different operating systems was the top priority for us since the beginning of the development. That’s why we choose Go programming language for our CLI application development.
Go (sometimes referred as Golang) is a statically typed, compiled programming language designed at Google. Among other awesome features of Go, there is one which was crucial for us — the ability to cross-compile code for different operating systems and architectures. In other words, it is possible for a developer running, for example, macOS on her laptop to build an application suitable for running on Windows or Linux, or any other operating system which is supported by the Go compiler.
The following short walkthrough will guide you through the process of creating a simple Hello world application and building it for Linux, Windows and macOS on M1.
Let’s start with writing the actual code for our application:
// hello.go

package main

import (
	"fmt"
	"runtime"
)

func main() {
	fmt.Printf(
		"Hello world from %s/%s\n",
		runtime.GOOS,
		runtime.GOARCH,
	)
}
If we build it (with go build hello.go command) and run the binary (./hello) it should display something like the following:
Hello world from linux/amd64
Hello world from windows/amd64
or
Hello world from darwin/arm64
That depends on the OS and architecture of the computer where we build our app. But as we mentioned earlier, it is possible to build Go applications for operating systems and architectures different than the one where we run the build process. With modern Go tools it is pretty straightforward. All we need to do is to set some specific environment variables — GOOS and GOARCH — and voilà, we build binaries for different operating systems and architectures.
At first, let’s build our “Hello world” app for Microsoft Windows:
GOOS=windows GOARCH=amd64 go build hello.go
If we run ls, we’d see that a new file (hello.exe) appeared in the current directory:
$ ls
hello.exe  hello.go
Let’s determine a type of the hello.exe file using file command:
$ file hello.exe
hello.exe: PE32+ executable (console) x86-64 (stripped to external PDB), for MS Windows
Now, let’s build our application for some old (32-bit) Linux:
GOOS=linux GOARCH=386 go build -o hello-linux-386 hello.go
A new file (hello-linux-386) should appear:
$ ls
hello.exe  hello.go  hello-linux-386
And it should be of 32-bit executable type:
file hello-linux-386
hello-linux-386: ELF 32-bit LSB executable, Intel 80386, version 1 (SYSV), statically linked, ..., not stripped
And finally, let’s build the same application for Apple Silicon:
GOOS=darwin GOARCH=arm64 go build -o hello-macos-arm64 hello.go
Running that go build command should create the third binary in our folder:
$ ls
hello.exe  hello.go  hello-linux-386  hello-macos-arm64
The type of the file is the following:
$ file hello-macos-arm64
hello-macos-arm64: Mach-O 64-bit arm64 executable, flags:<|DYLDLINK|PIE>
With this simple trick you can build Go applications for different operating systems and architectures on your laptop or a single build server.
Multi-CPU architecture container images. How to build and push them on Docker Hub (or any other registry)
Multi-CPU architecture Docker container images
In the previous section we were talking about Go programming language and its ability to easily cross-compile applications for different operating systems and CPU architectures using just a developer’s laptop.
With this post, I’m going to describe some other aspects of modern cross-platform applications development.
Our application
It’s worth repeating that at Tidal we build our CLI application — Tidal Tools — to make it easier for our customers to deal with all sorts of data necessary on their way towards the clouds. Tidal’ May 2021 Newsletter describes Tidal Tools as the
meat-and-potatoes of how you’ll start your cloud journey.
The CLI app could be run anywhere:
Locally
- on Microsoft Windows
- on Apple macOS (Intel or M1)
- on GNU/Linux
Or preinstalled on a free cloud VM in:
Tidal Tools architecture in brief
Tidal Tools is a Go command-line interface (CLI) application. It mostly acts as a Tidal API client accompanying our web application. It also has some additional features like source code and database analysis.
Those two extra functionalities are implemented by our technological partners in other programming languages.
We build Docker container images for such 3rd-party solutions and our application (Tidal Tools) runs containers under the hood using the awesome Docker Go SDK.
Problems with container images
While preparing a new release of Tidal Tools for M1 Macs we discovered that our existing Docker container images won’t work on the new Apple Silicon architecture. After some investigation we figured out that we build our container images for amd64 architecture, while M1 Macs expect images for arm64 CPU architecture.
Docker images can support multiple architectures, which means that a single image may contain variants for different architectures, and sometimes for different operating systems, such as Windows.
When running an image with multi-architecture support, docker automatically selects the image variant that matches your OS and architecture.
After some trial and error with our Docker images we are now finally confident in our happy path on how to build multi-CPU architecture Docker container images. In other words, we now know how to build container images for different architectures and push such images to container registries (e.g. Docker Hub) to be used on machines with different OSes and architectures. In short, build on (for example) Debian GNU/Linux — run on (for example) macOS for M1!
So, without further delay, let’s jump straight to the topic!
How to build multi-arch container images with docker buildx
CAUTION! To build container images with multi-CPU architecture support, you need to use parent image which supports multiple CPU architectures. Most of the official images on Docker Hub provide a variety of architectures. For example, the openjdk image variants (which we’re going to use later) support arm64v8 and amd64.
For this example, we’re going to use “Hello world” application written in Java:
// HelloWorld.java

public class HelloWorld {
  public static void main(String[] args) {
    System.out.println("Hello world!");
  }
}
Let’s start with a Dockerfile:
# Dockerfile

FROM openjdk:8-jdk-slim AS builder
COPY HelloWorld.java /app/
WORKDIR /app
RUN javac HelloWorld.java

FROM openjdk:8-jre-slim
COPY --from=builder /app/HelloWorld.class /app/
WORKDIR /app
CMD ["java", "HelloWorld"]
To make it possible to build multi-CPU architecture container images we need to install Docker Buildx. Docker Buildx is a CLI plugin that extends the docker command with some additional features, and multi-arch builds is one of those. If you’re using recent Docker Desktop or Docker for Linux packages chances are high that Buildx is already available for you. If not, check the installation instructions.
Create and switch to using a new builder which gives access to the new multi-architecture features:
docker buildx create --name mybuilder --use
Log in to a Docker registry:
docker login
Build and push multi-arch container image for x86-64 (amd64) and AArch64 (arm64) CPU platforms (replace your-username with the actual Docker registry user name):
docker buildx build . \
  --platform linux/arm64,linux/amd64 \
  --tag your-username/hello-world:latest \
  --push
Running the above commands would build and push multi-arch container images to your Docker Hub profile:
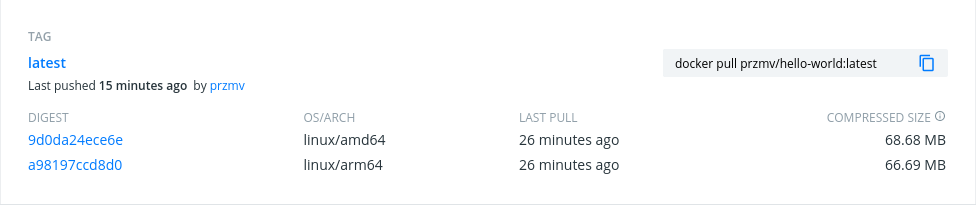
Multi-arch container images
When running such image with multi-architecture support, docker automatically selects the image variant that matches the running OS and architecture.
With this simple trick you can build Docker container images for different operating systems and architectures and host such images on Docker Hub.
Automating multi-arch container images builds (we used Google Cloud Build but GitHub Actions would also work)
Automating multi-arch container images builds
In the previous section we were talking about building multiple CPU architecture container images.
This section will guide you through how to implement a pipeline for building multi-architecture container images using Google Cloud Platform’s Cloud Build or GitHub Actions.
As you already know, to build multi-arch container images we need to setup virtual environment and run docker buildx.
Let’s configure such build pipelines for some popular CI/CD solutions.
Cloud Build
Cloud Build is a service that executes your builds on Google Cloud Platform’s infrastructure.
To run multi-arch container images builds let’s use the following pipeline configuration:
steps:
  - name: gcr.io/cloud-builders/docker
    args:
      - run
      - "--privileged"
      - "linuxkit/binfmt:v0.7"
    id: initialize-qemu
  - name: gcr.io/cloud-builders/docker
    args:
      - buildx
      - create
      - "--name"
      - mybuilder
    id: create-builder
  - name: gcr.io/cloud-builders/docker
    args:
      - buildx
      - use
      - mybuilder
    id: select-builder
  - name: gcr.io/cloud-builders/docker
    args:
      - buildx
      - inspect
      - "--bootstrap"
    id: show-target-build-platforms
  - name: gcr.io/cloud-builders/docker
    args:
      - buildx
      - build
      - "--platform"
      - $_DOCKER_BUILDX_PLATFORMS
      - "-t"
      - "gcr.io/$PROJECT_ID/hello-world:latest"
      - "--push"
      - .
    id: build-multi-architecture-container-image
options:
  env:
    - DOCKER_CLI_EXPERIMENTAL=enabled
substitutions:
  _DOCKER_BUILDX_PLATFORMS: "linux/amd64,linux/arm64"
The above configuration creates the pipeline to set up the build environment (initialize-qemu, create-builder, select-builder, and show-target-build-platforms steps), to build a multi-arch container image and to push it to the Container Registry on Google Cloud Platform (build-multi-architecture-container-image step).
To push to another container registry (e.g. Docker Hub) update the build-multi-architecture-container-image step accordingly.
Please consult the Cloud Build documentation to get the information on how to trigger builds (manually or automatically).
GitHub Actions
If you prefer to use GitHub Actions instead of Cloud Build, it is also possible.
The pipeline configuration to build multi-arch container images is the following:
name: ci
on:
  push:
jobs:
  buildx:
    runs-on: ubuntu-latest
    steps:
      - name: checkout code
        uses: actions/checkout@v2
      - name: setup qemu
        uses: docker/setup-qemu-action@v1
      - name: setup buildx
        id: buildx
        uses: docker/setup-buildx-action@v1
      - name: available platforms
        run: echo ${{ steps.buildx.outputs.platforms }}
      - name: login to docker hub
        uses: docker/login-action@v1
        with:
          username: ${{ secrets.DOCKER_USERNAME }}
          password: ${{ secrets.DOCKER_TOKEN }}
      - name: build the image
        run: |
          docker buildx build \
          --push \
          --tag ${{ secrets.DOCKER_USERNAME }}/hello-world:latest \
          --platform linux/amd64,linux/arm64 .
To make it work you need to set up some secrets on GitHub:
DOCKER_USERNAME— your user name on Docker HubDOCKER_TOKEN— your Docker Hub access token
Conclusion
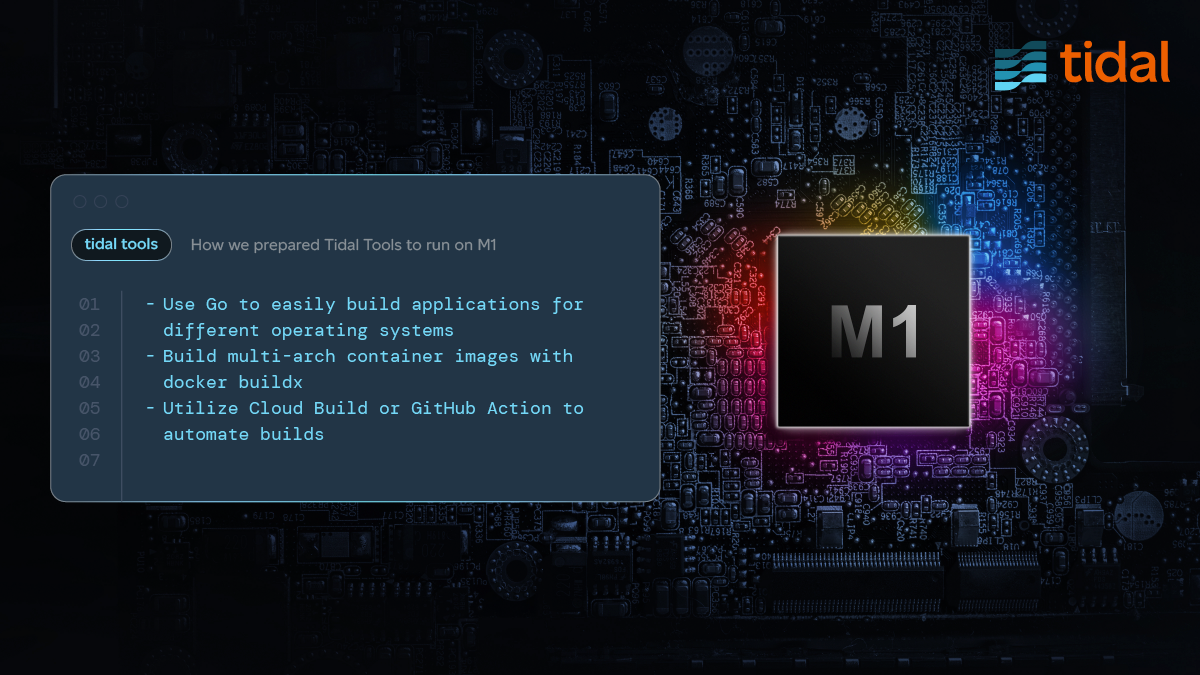
To sum up let’s repeat the key points on how to prepare an application for M1 (Apple Silicon):
- Use Go to easily build applications for different operating systems
- Build multi-arch container images with
docker buildx - Utilize Cloud Build or GitHub Action to automate builds