

Use Nmap for faster discovery in Cloud Migrations
When starting a cloud migration project, one of the most important and often challenging parts is to have an accurate understanding of what you are trying to migrate. Over time, companies start new projects, which means creating new infrastructure, adding servers, databases, etc. This is a normal part of the development cycle. However, despite best efforts, inventories get out of sync.
We have 5 inventories and lists of servers, but we don’t trust any of them.
Imagine this simple scenario where a database needs to be migrated from location A to location B. After it is done, the old database in location A must be decommissioned and the infrastructure inventory must be updated. It is not uncommon, that after the migration is finished, the inventory - a CMDB, ops tool or often: an excel file - is adjusted to add the new server and database instance, but no one ever removes the old database from the source inventory.
Now imagine that type of change occurring many times over the years and it doesn’t take long to realize why people don’t trust their inventory. Inventory is increasingly becoming ephemeral.
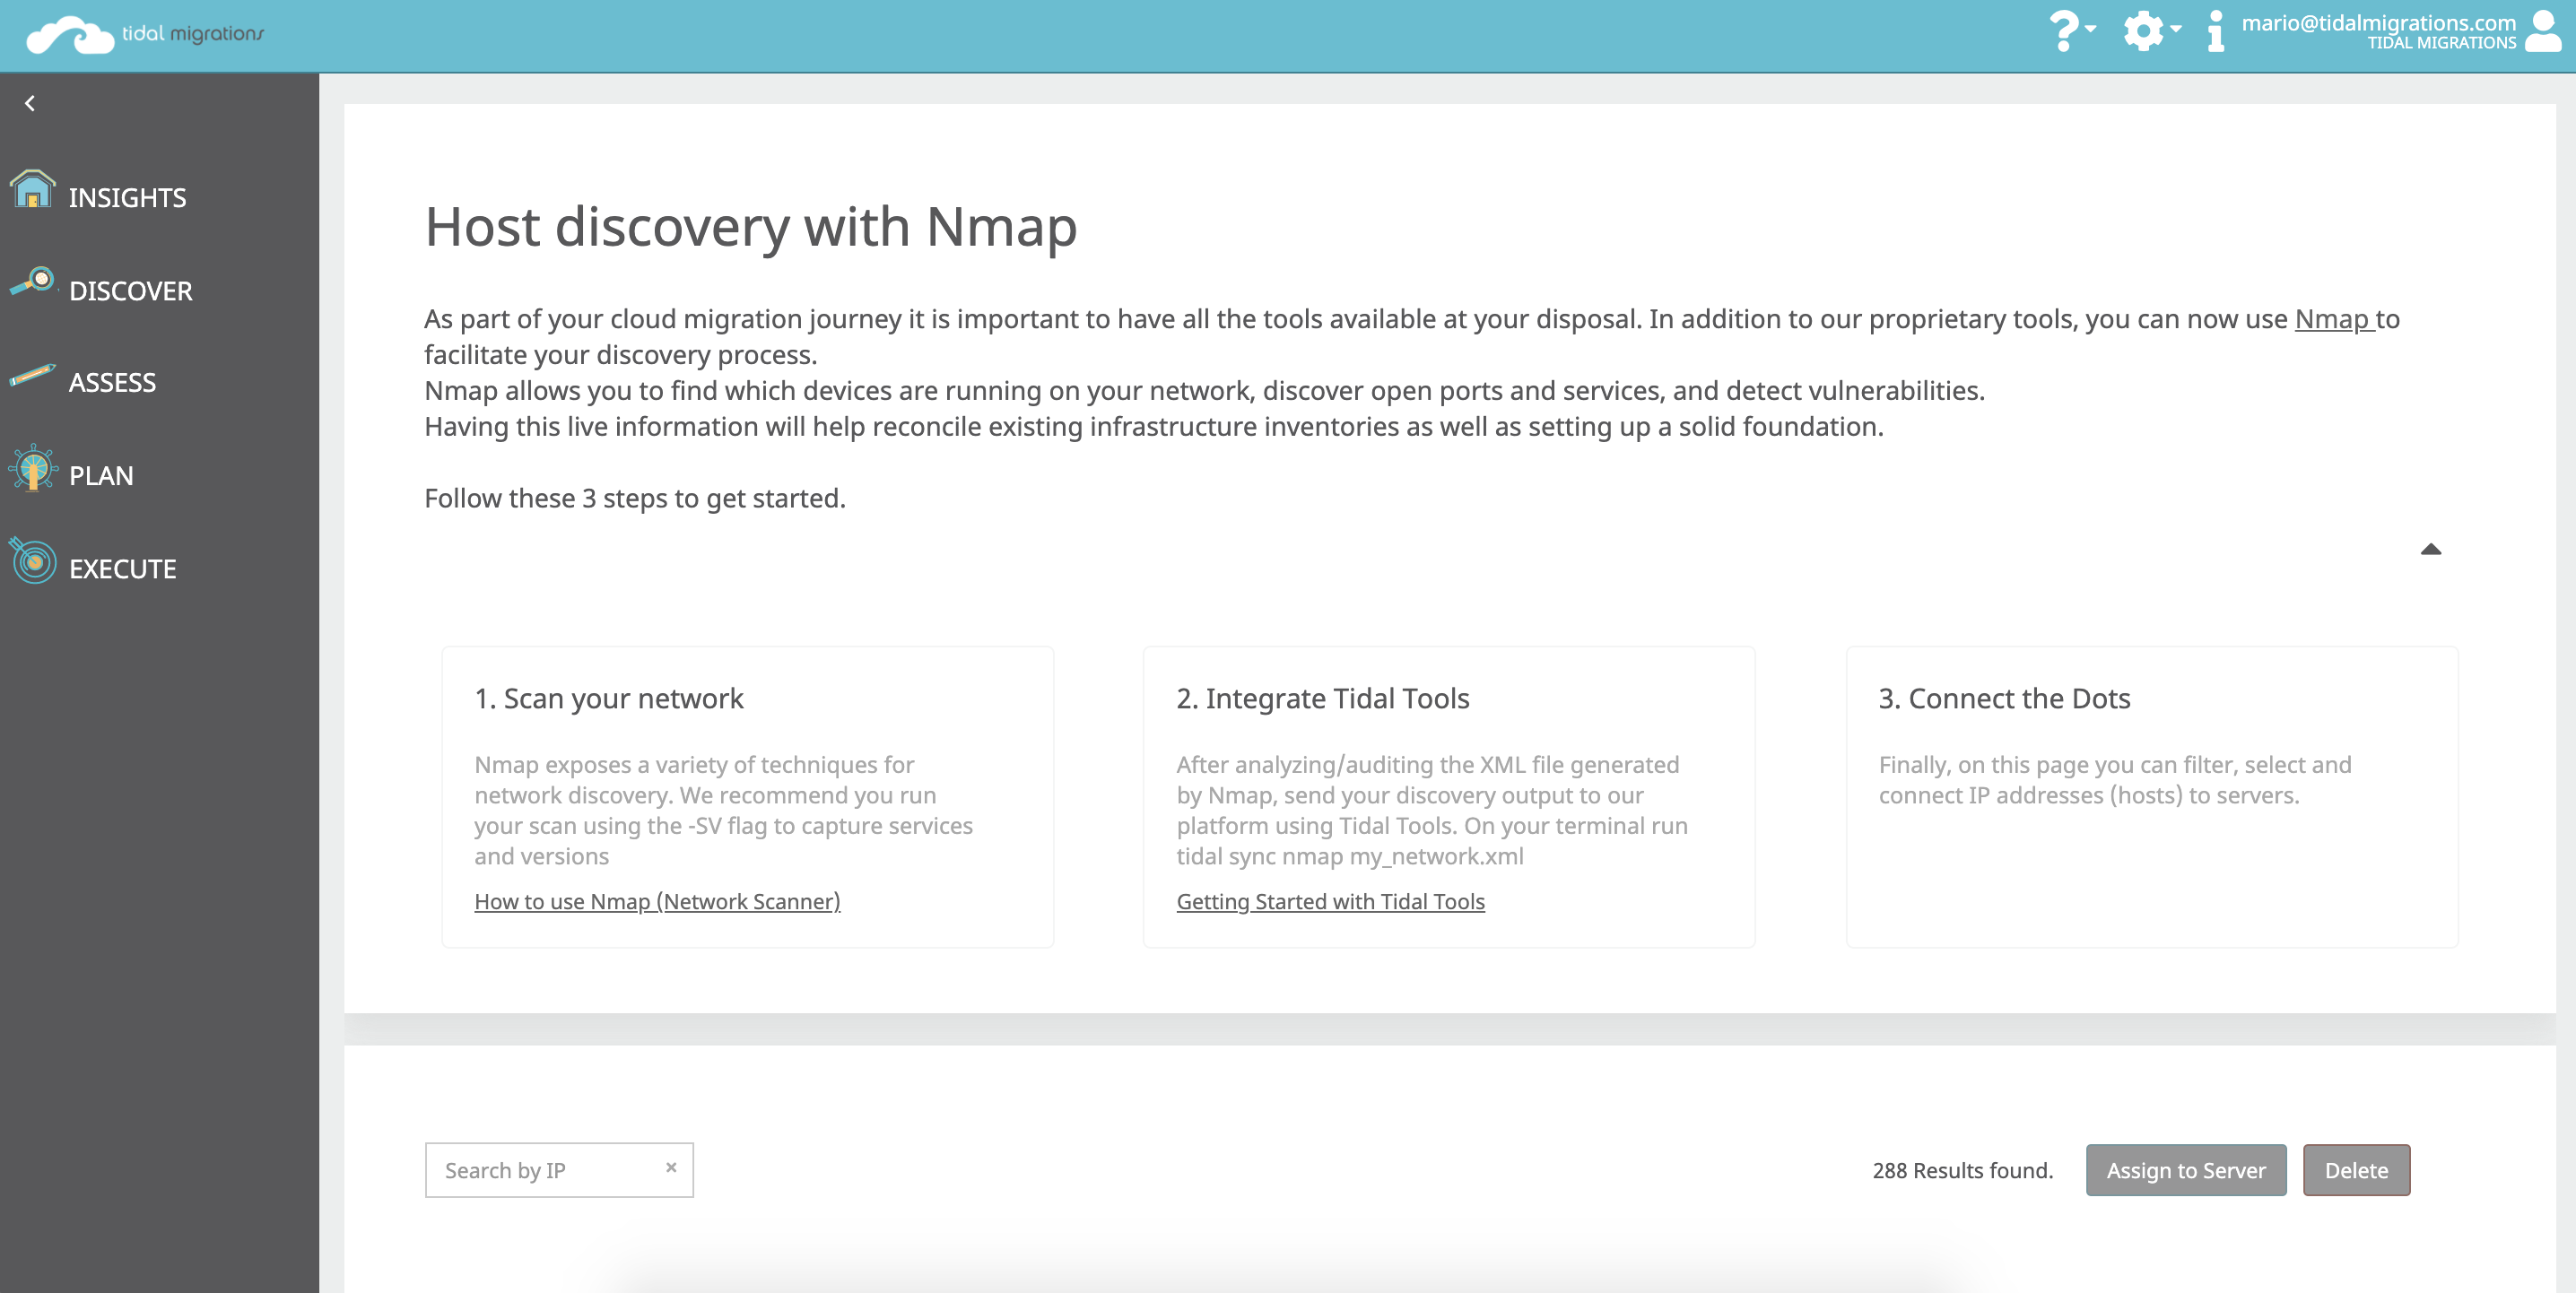
Solution
At Tidal, we empower companies to drive faster cloud migrations with rapid discovery and assessment of their application portfolio. In addition to our own tools, people can use 3rd party tools that they might already have installed via Tidal API integrations. Today, people can also leverage the widely used Nmap utility to perform exhaustive host discovery and reconcile their infrastructure inventory.
What is Nmap? Nmap is a free and open-source network scanner used by security researchers, network administrators, and migration experts alike. It can be used to discover services running on single hosts, as well as vast networks that contain hundreds of thousands of devices across a multitude of subnets.
Nmap scans a network by sending packets to system network ports, then it analyzes their responses to figure out what ports are open, closed, or filtered by a firewall. As a result, Nmap can identify devices and services running on a network without you needing to deploy agents or request permissions to servers via SSH or WinRM, etc.
In addition to infrastructure reconciliation, scanning your network with Nmap can alert you to known security vulnerabilities. For example, it might identify older software that can be exploited by bad actors, as well as providing you with an opportunity to close open ports that shouldn’t be accessible in the first place.
At Tidal, we have built capabilities to leverage the output generated by Nmap and send it to our Platform where our users can assess their data, update their inventory, and facilitate their cloud migration journey.
Nmap integrates directly with Tidal to help you on getting an accurate inventory for your cloud migration project
How to Use Nmap
You can find the official binary packages for all major operating systems (Linux, Windows, Mac OS) at Nmap’s website, and while there is a GUI option to download, here we will cover how to use the CLI version together with Tidal.
Nmap offers a wide range of scanning utilities, such as port scanning, host discovery, service version detection to name a few. The documentation is very extensive and easy to follow.
Once Nmap has been installed, you can run nmap -h at the command prompt at any time. It will display your current version, as well as a breakdown of its commands.
Its command structure is as follows:
nmap [ <Scan Type> ...] [ <Options> ] { <target specification> }
Nmap has sensible defaults, so the most basic command will yield results right away. Simply provide a target, single IP, hostname or a range of IPs:
nmap 192.168.1.1-254
A common scan type is Host Discovery via ICMP Echo (aka “ping”). To do this, you can use -sn to disable port scanning:
nmap -sn 192.168.1.0/24 # Ping sweep a subnet
And if you’re curious about how your range expressions are evaluated, you can use -sL to list targets only, without scanning them at all:
nmap -sL 192.168.1.1-3,10-20 # No Scan. List targets only
To say there are a lot of scan types you can run using Nmap is an understatement. In addition to the built-in flags, there is also an entire ecosystem of extensions and plugins that scanning experts employ in those hard to scan environments. To keep this blog from becoming War and Peace, I will share two of my favorite commands to get you started right away.
nmap -T2 192.168.1.0-127
-T - Timing mode. Adjusting the frequency of packets being sent can be used to evade or comply with some of the rules in firewalls or IDS. When running Nmap in timing mode, you must use either “Paranoid”, “Sneaky”, “Polite”, “Normal”, “Aggressive”, “Insane” or a number from 0 (Paranoid) being the slowest, waiting 5 minutes between sending each probe to 5 (Insane) which will be easily detectable.
To more efficiently scan your network, limit yourself to the known ports for common web applications and databases. Also, save your output as XML so you can incorporate the results into your migration planning.
nmap -sS -p80,443,8080,8443,1433,1521,27017 10.0.0.0/24 -oX my_network_scan.xml
-sS - enables TCP SYN Stealth port scan.
-p - lets you specify the ports you are interested in, therefore improving your scan speed.
-oX - generates an XML file with the output of the scan.
It is possible to combine a Nmap command and our Tidal Migration integration in just one step.
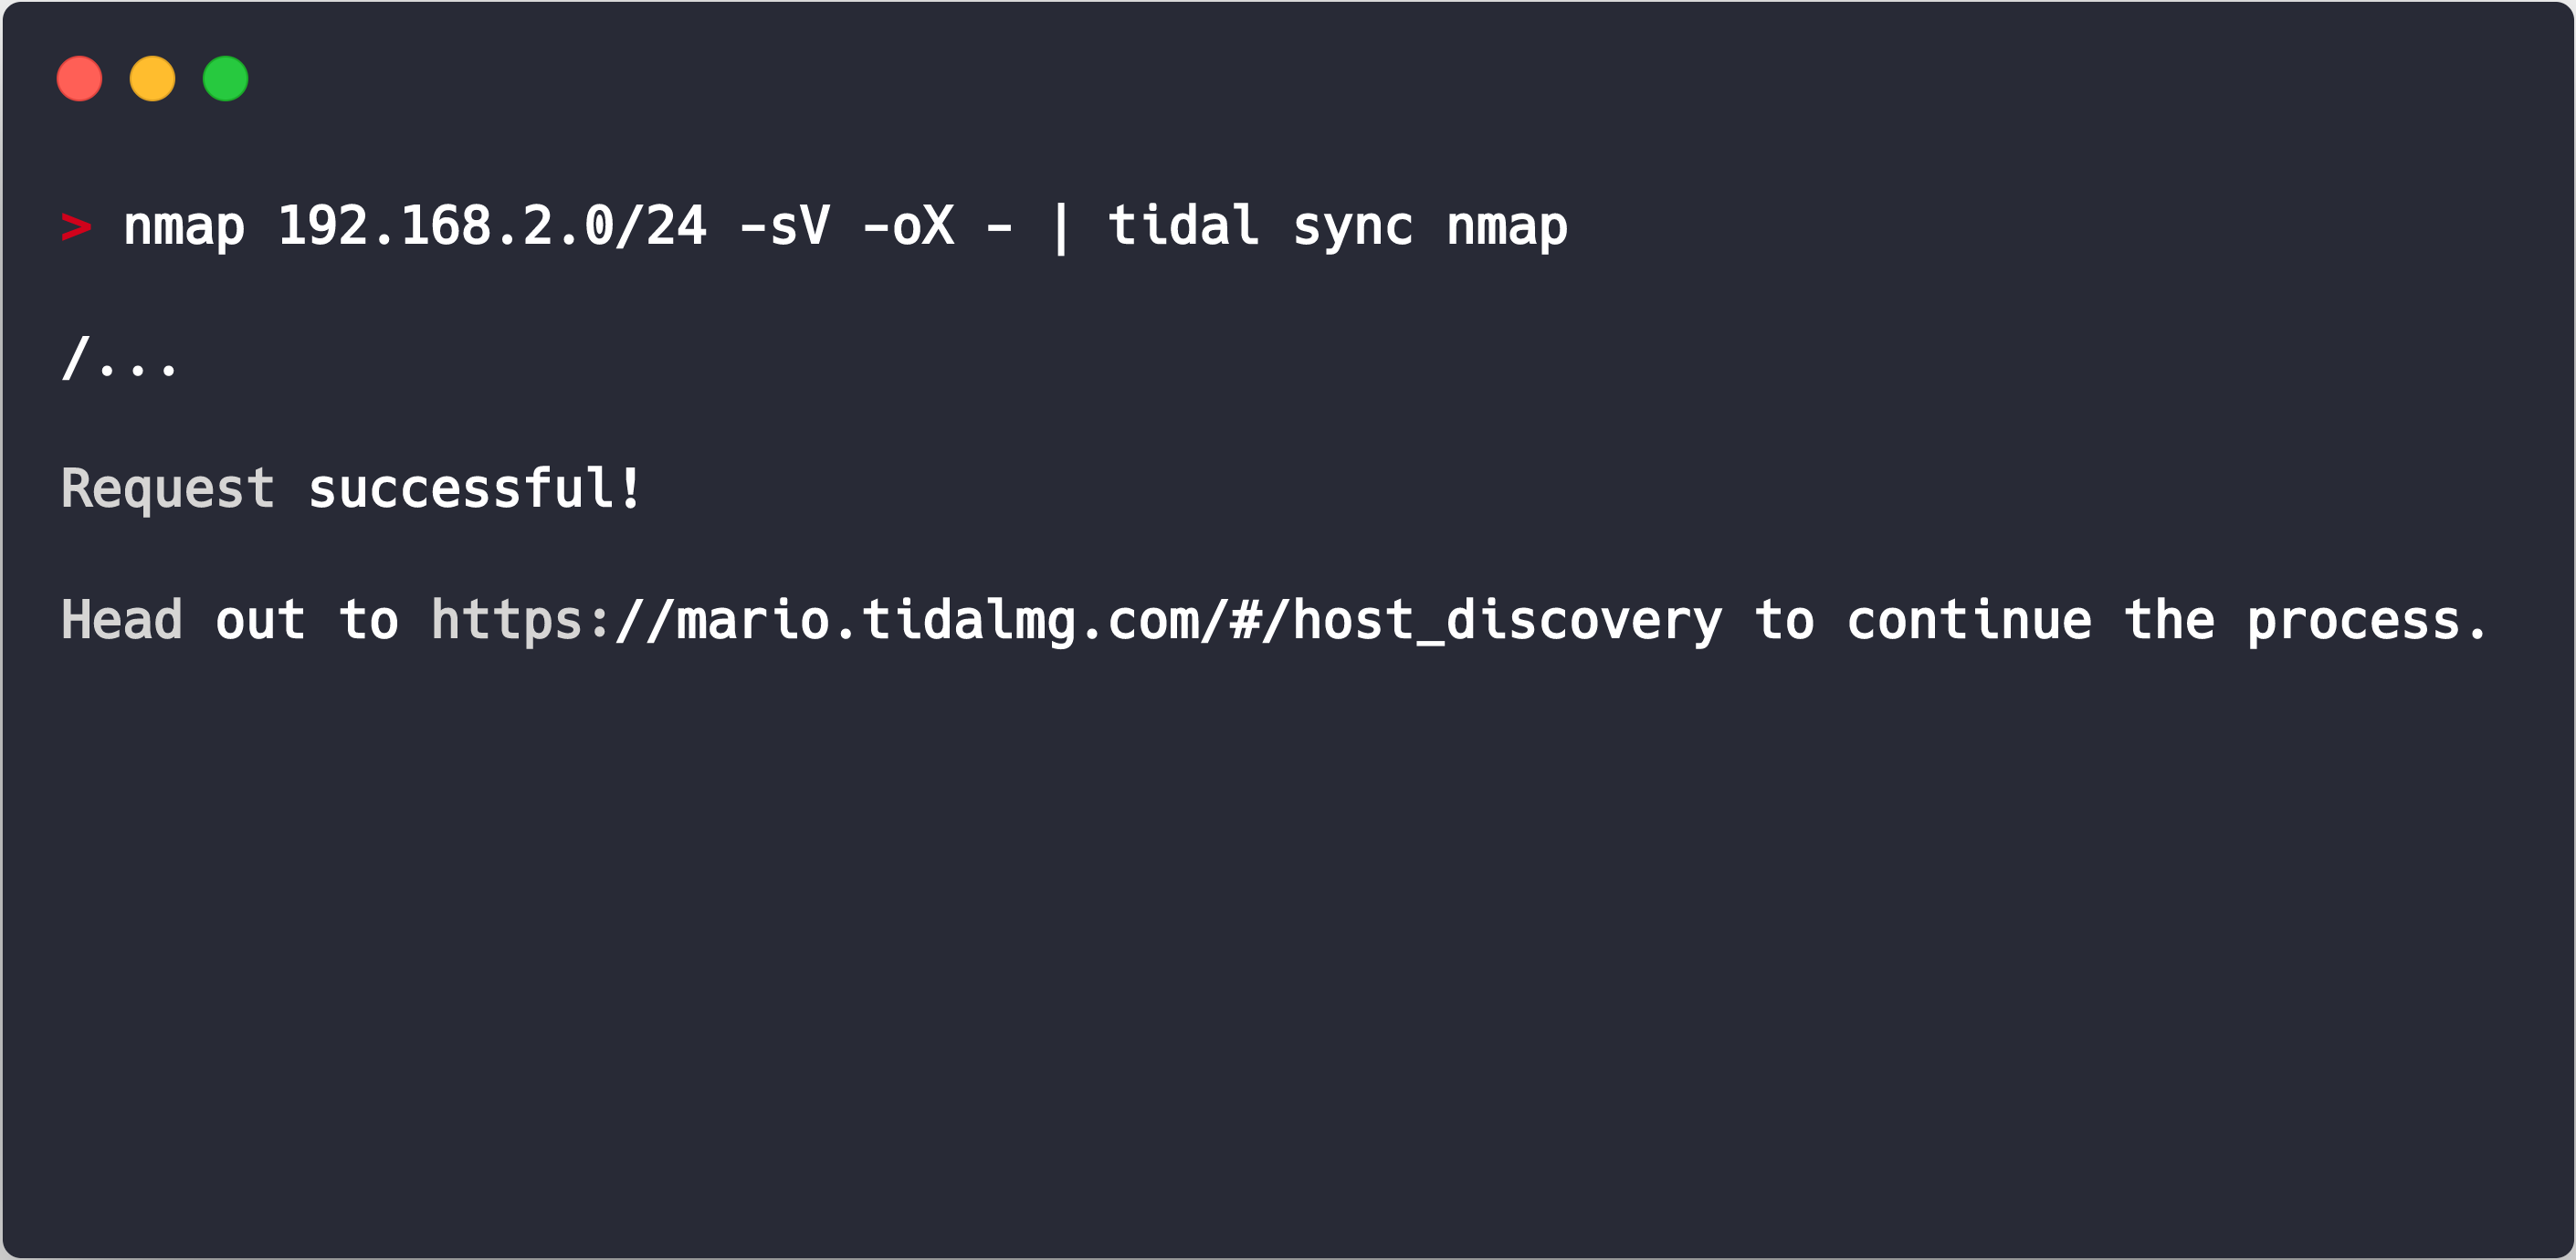
Nmap - Tidal
Let’s break this example into two parts.
To start, Nmap is going to scan an IP Address and its range, the -sV flag indicates Service and Version detection on open ports, and -oX declares that we want the output in XML format.
After the scan is completed, our CLI Tidal Tools will pick up the output and send it to your Tidal account where you can continue your discovery process.
Summary
Whether you are migrating to the cloud today or just preparing your infrastructure for a future shift. Having a solid understanding of your current inventory and infrastructure is a must.
After this brief introduction to Nmap, its capabilities, and how to use it, I hope you feel encouraged to use this tool in your cloud migration journey. There is plenty of information on its official website, and a strong community backing it up.
Happy discovery :)
-Mario Mejia
Senior Software Engineer, Tidal
Want to know more about Tidal?
Tidal is a cloud migration platform that gives you this application inventory, discovery and assessment all in one place. Delivered as a SaaS platform, you can import your spreadsheets or deploy our tools and get moving today. Results in minutes, not months. Migrate with confidence.